


App prototypes are critical for businesses for multiple reasons.
Firstly, they validate ideas before investing extensive resources in full development, saving time and money. Secondly, a well-designed prototype can attract investors and stakeholders, with a remarkable 9,900% ROI on UX investment.
This UXCam guide will lead you through essential steps and best practices in app prototyping, enabling you to bring ideas to life efficiently. Whether you're a seasoned developer or just starting, this guide provides valuable insights into the prototyping process.
Let's get started!
What is an app prototype?
An app prototype is a preliminary visual mock-up that looks and feels like a real app. It exhibits the app’s fundamental purpose and design but does not contain functional code.
You can use different types of prototypes to explore and test your app ideas, from simple sketches to high-fidelity, interactive, clickable prototypes. Prototypes are essential in the early stages of app development, as they help your design team to rapidly experiment and refine concepts.


Prototypes help get your entire development team on the same page, aligning the creative ideas with the designers, developers, project managers, and stakeholders. They also provide an opportunity to test the wildest, craziest ideas, and decide whether to drop them or push them forward.
Benefits of app prototyping
App prototyping results in the following:
Fast Iterations: Mobile app prototyping allows development teams to quickly iterate on a design or idea, and gives stakeholders an easy way to provide feedback.
Higher Quality Apps: Prototypes make it easier for developers to follow the original vision for the app, eliminating costly misunderstandings that could arise from working with wireframes alone.
Improved UX/UI Design: App prototyping allows developers to test out different user interface (UI) design options before committing them
Reduced Development Costs: Prototyping minimizes design iterations and ensures alignment on the app's basic functionality.
How to make a mobile app prototype
Come up with must-have features
Choose a prototyping tool
Sketch your ideas
Move to your prototyping tool
Give the prototype a professional look
Turn your prototype into a mobile app
Test, iterate, and test some more
Step 1 - Come up with must-have features
Your prototype shouldn’t reflect every single feature you want in the final product—the goal is to start thinking about how your most essential features will look, feel, and interact with one another.
So, what does your app do? If you’re starting with a problem that you’re trying to solve (highly recommended), work backward and think about what features are needed to effectively solve it.
For example, imagine you’re creating a job application management tool for students. You might decide that the first version of your app should include features like:
A job board
An application tracker
A task management system with reminders
The ability to create and store resumes
These are the core features you’ll focus on in the prototype.
Step 2 - Choose a prototyping tool
Next up, you’ll need to choose a prototyping tool.
While you can use a pen and paper for the entire process, this makes interactivity difficult—you’ll be stuck using arrows to demonstrate cause and effect. We recommend using an online prototyping tool to create a clickable prototype.
There are plenty of great options out there, including:
Figma
Proto.io
Bubble.io
UXPin
ProtoPie
Justinmind (best for teams on a budget)
All of these tools will offer similar features—drag-and-drop editing, a UI element library, and collaboration tools. Try a few out and pick the one that suits your needs best.
Step 3 - Sketch your ideas
It’s time to start by sketching your ideas. And yes, we mean using a pen and paper (or digital equivalent) here.
While you are going to want a digital prototyping tool down the line, a pen and paper is faster and more flexible to start with. You don’t need to create a masterpiece, instead focus on getting the structure of your idea down quickly.
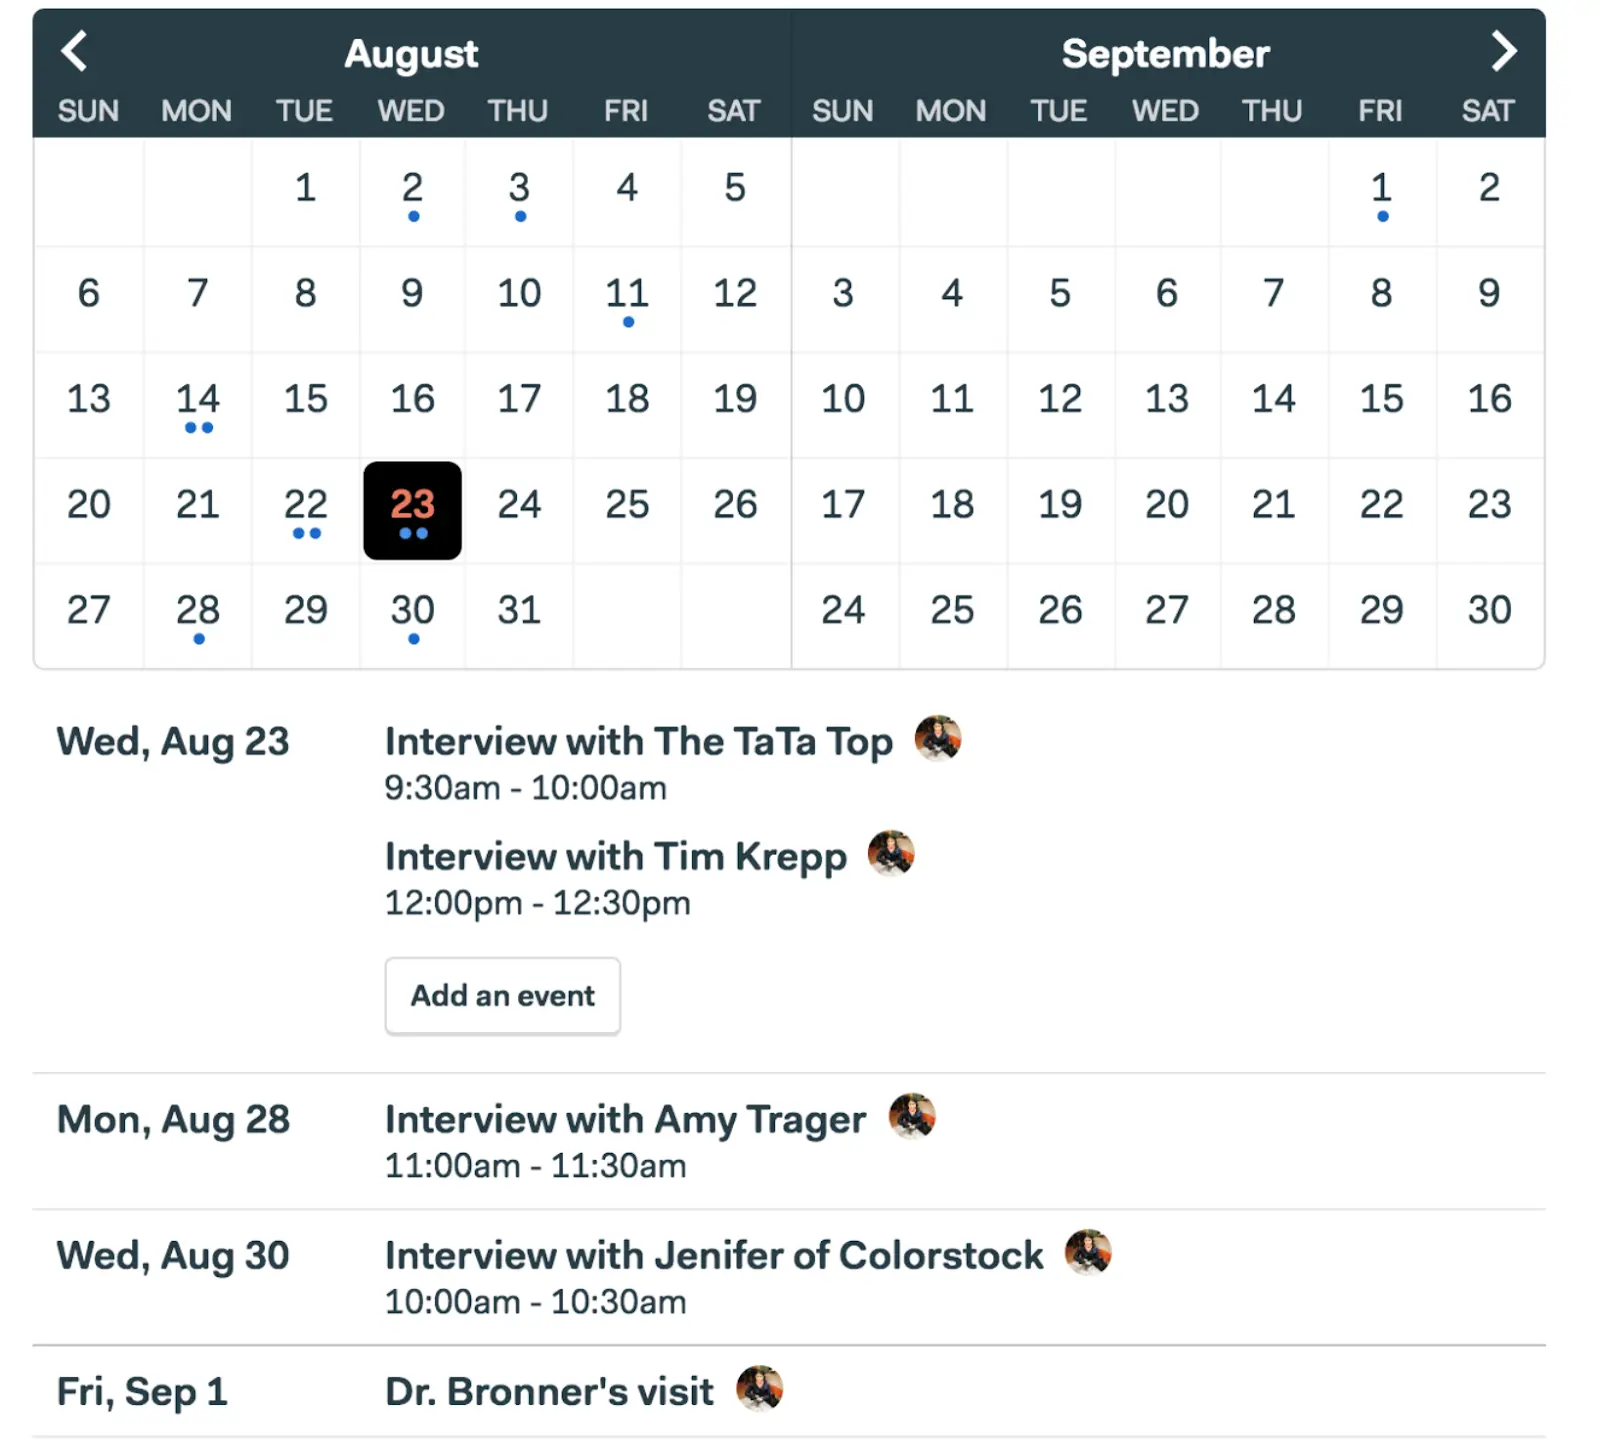
To illustrate, here’s a prototype sketch of a calendar feature made by the Basecamp team.


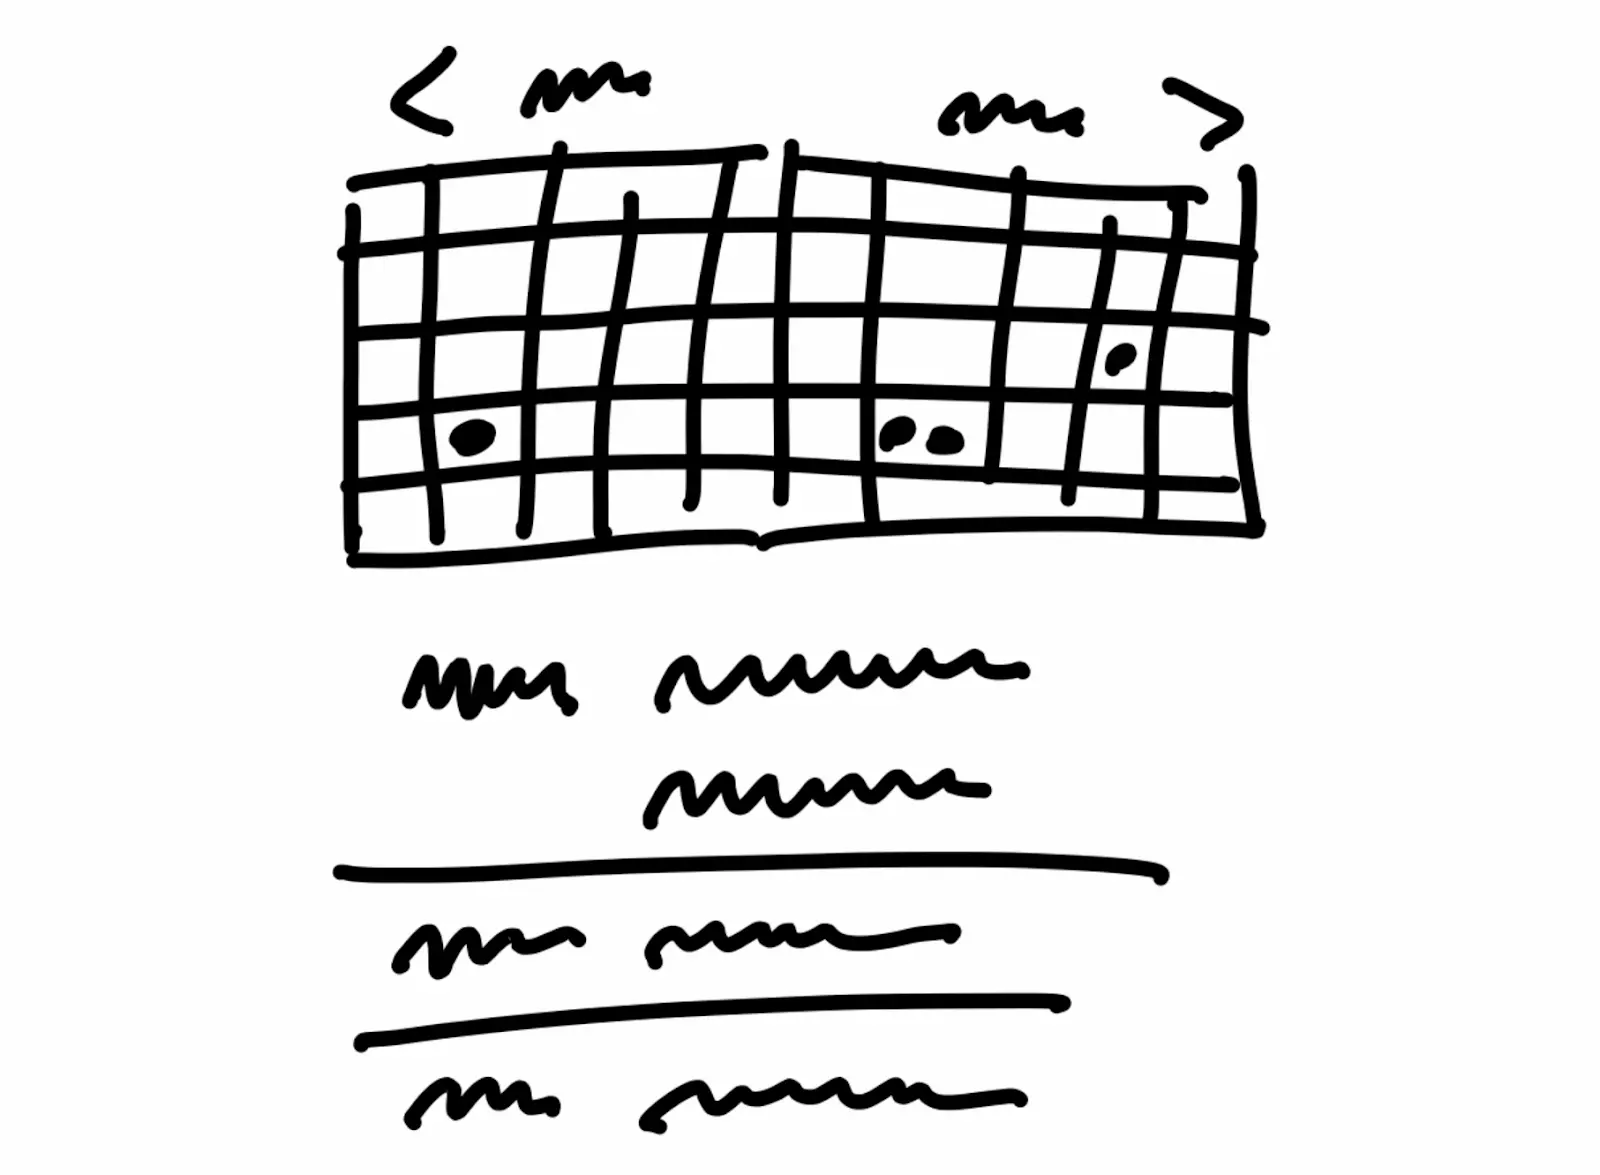
It’s very rough, but it effectively communicates the essence of the feature (as demonstrated by the result below).


There’s no set order you need to follow here. If you have an idea for a specific screen (e.g., the homepage), start sketching it out until you think you’ve found the best solution. You can also make multiple sketches of the same screen to compare and contrast the pros and cons.
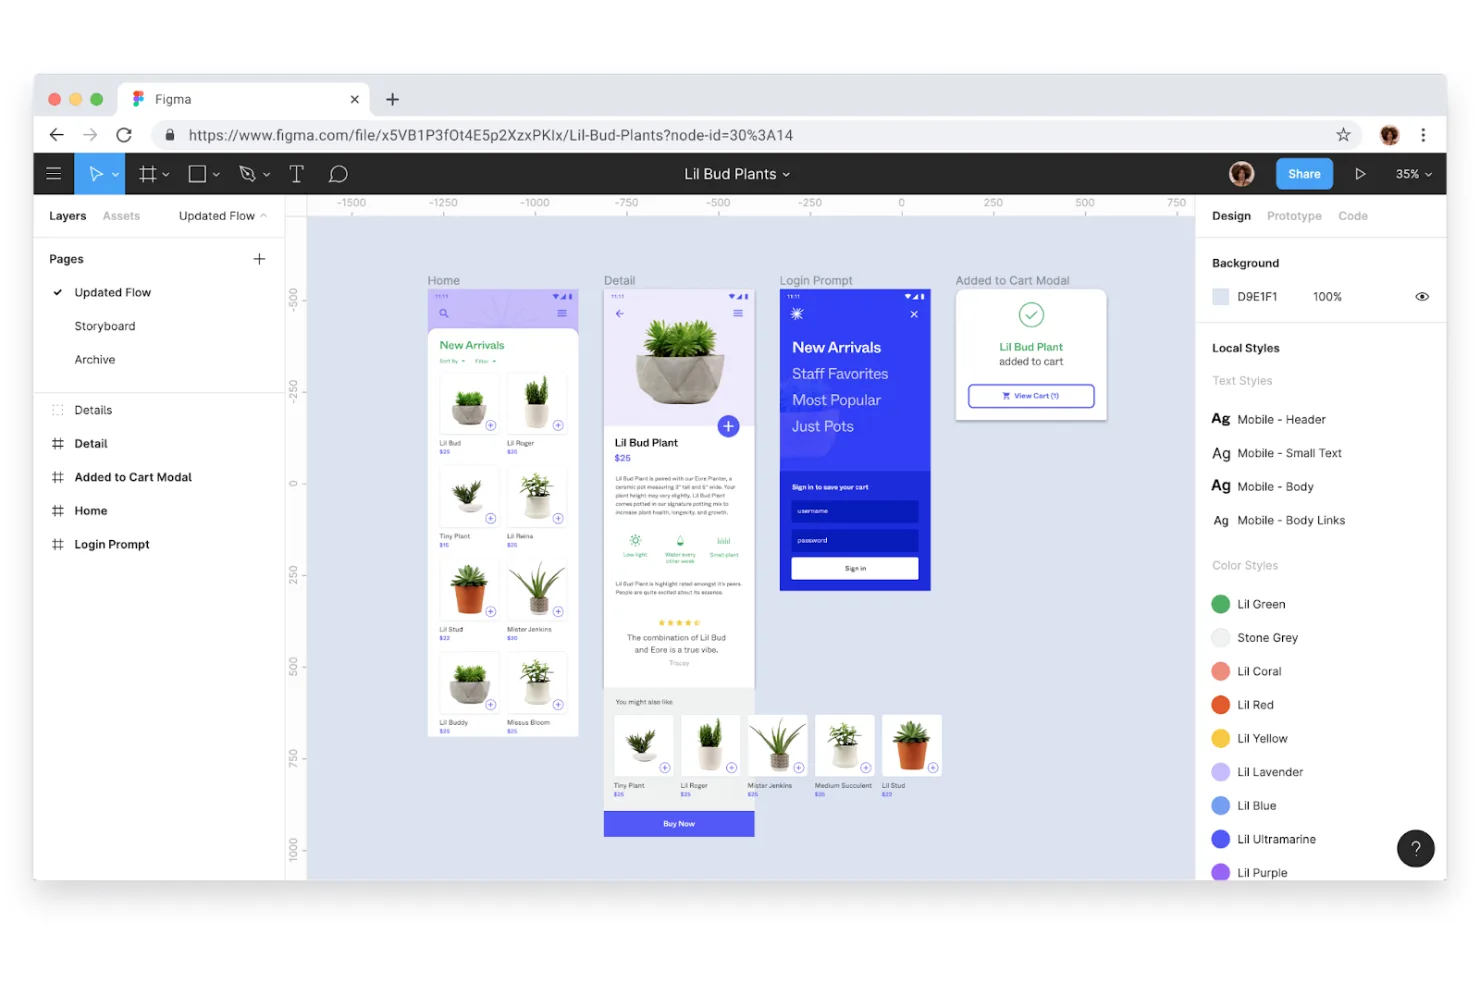
Step 4 - Move to your prototyping tool
Once you have a few sketches, you can start relocating them into your prototyping tool. This is where you start bringing your sketches to life, turning them into clickable prototypes with basic functionalities. You may also need to determine the interactions and flows that will take place between different screens during this phase.
While it’s tempting to get bogged down in aesthetics, layout, and structure are much more important at this stage. It’s easy to change color palettes and fonts—it’s much harder to add in new buttons and features once the design is locked in.
Step 5 - Give the prototype a professional look
Once you have your sketches, it’s time to give your prototype a professional look. This involves refining your sketches and adding details like colors, fonts, and images.
Refine sketches: Clean up and clarify your initial sketches, removing unnecessary elements and ensuring a balanced layout.
Choose colors: Select a cohesive color palette that aligns with your brand or design concept.
Use consistent fonts: Pick fonts that work well together and reflect the desired tone, ensuring legibility and consistency.
Add relevant images: Incorporate high-quality visuals that enhance the user experience and support the design concept.
Pay attention to details: Fine-tune the prototype by adding subtle elements like shadows or textures for a polished look.
Step 6 - Become a mobile app product expert
If you are reading this blog post, you want to develop a successful mobile app. We have created a course to help you do just that:
A detailed, step-by-step guide with over 15 templates and frameworks
Free certification upon completion
Content derived from expert interviews
Certification document for your resume and LinkedIn profile
The course is divided into four modules, each building on the previous one and following the typical product management cycle:
Module 1 - Plan: Introduction to the North Star Framework
Module 2 - Discover: Exploration of the Opportunity Tree, Decision Matrix, and Shape Up Methodology
Module 3 - Deliver: Implementation of the "2 to 98" Framework for Delivering Updates
Module 4 - Measure: Analysis of KPIs and Their Tracking Methods
Become a certified mobile app product manager for free here.


Step 7 - Turn your prototype into a mobile app
It’s time for the app development phase, where you’ll transform your prototype into a functional mobile app. You have to work closely with the development team to ensure they understand the prototype and design specifications.


This is a complex process (as you know), so we’ll skip the technical details and highlight two incredibly important considerations when working from an app prototype:
Remain flexible: You may have to make design or feature changes along the way, so be open-minded and ready for revisions. Some features will need to launch as MVPs, with updates later.
Stay on target: Working with a prototype helps keep the development team aligned to the project vision and timeline. Make sure everyone has access to the prototype and that you regularly return to it during the development process.
Step 8 - Test, iterate, and test some more
Once you have a functional MVP, you can start testing your design choices with real users and data—but you’ll need a product analytics tool.
For mobile apps, UXCam offers an all-in-one analytics platform that collects qualitative and quantitative product and user experience data. Features like frustration monitoring, issue analytics, and funnels help you spot UX issues easily.


Session replays and heatmaps let you zoom in on individual sessions to find root causes.
Remember—app prototypes and the MVPs they facilitate are never perfect. Building a successful product is a process of iterative improvement. At each stage—sketching, prototyping, development, testing, and updating—your app should be getting better.
Conclusion
App prototyping is a dynamic and iterative process that demands a thoughtful approach. Using best practices like iterating, prototypes in real situations, starting with sketches, maintaining consistency, building designs in layers, and applying design thinking, you can boost the efficiency and effectiveness of app development.
When it’s time to fine-tune your app using real-world data, UXCam is a valuable tool. We offer features like heatmaps, session replays, event analytics, and frustration monitoring to help you identify the root causes of user issues and optimize the app experience.
Sign up for UXCam today to unlock the full potential of your app.
You might also be interested in these;
How to make and justify design decisions with data
How to analyze session recordings
Mobile app growth strategy - How to Increase app user base
AUTHOR
Tope Longe
Product Analytics Expert
Ardent technophile exploring the world of mobile app product management at UXCam.


Related articles


UX design
User Experience Optimization: 10 Steps to Improve UX in 2026
User experience optimization is the iterative process of removing friction, improving clarity, and raising the conversion and retention signals on a...


Silvanus Alt, PhD
Founder & CEO | UXCam


UX design
We Reviewed the Top 19 UX Tools for 2026
The 19 best UX tools for 2026, tested across research, wireframing, prototyping, flowcharts, and handoff. Honest pros, cons, and pricing from a...
Silvanus Alt, PhD
Founder & CEO | UXCam


UX design
Customer Experience Dashboard Examples and the Metrics That Actually Matter
A customer experience dashboard turns scattered signals into one view. See examples, the metrics that matter, and how to build one that drives...
Silvanus Alt, PhD
Founder & CEO | UXCam